Blog Archives

Leek and chickpea soup


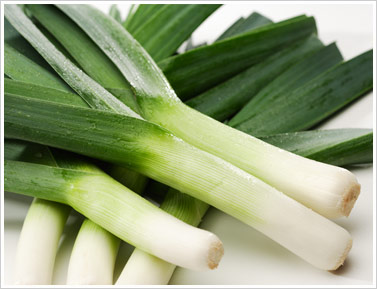
It’s so freezing outside that I thought I should share with you a soup recipe that has become one of my all-time favourites. I adore leeks and seeing as they are in season, now is an ideal time to whip this up. I really didn’t like the idea of chickpeas in soup at first – but although it only has a few ingredients, the flavour is amazing. I originally saw this made on a Jamie Oliver cooking show way back when. I’ve made it my own and no longer need the recipe to guide me. Everyone I have served it to has been impressed 🙂

So – introducing …

 Leek and Chickpea Soup

  • 2 tablespoons of butter
  • 4 leeks
  • 3 desiree potatoes, peeled and cut into cubes
  • 2 cans of chickpeas, drained and well rinsed
  • 1.5 – 2 litres of chicken stock
  • Parmesan cheese (to serve, but optional)

Cut leeks down the middle, discarding the tough green part at the top, and clean thoroughly under running water. Chop fairly finely.

Melt the butter in a large saucepan and add leeks and a few good pinches of salt. The salt will not only add flavour, but allow the leeks to wilt, without colouring. This should take about five minutes over a medium heat – ensure you keep an eye on it and stir regularly.

Add the potatoes, along with the chickpeas and cook until heated through. Add stock at this point – enough to generously cover the mixture.

Bring to the boil and simmer for 15 minutes, or until potato cubes are tender.

Remove from heat and using a stick mixer (or blender), blitz the ingredients, but leave some chunky bits.

Blitzing ensures the soup is beautiful and creamy, but leaving some chunky bits of chickpea and leek means there is really nice texture too. However, feel free to blitz to a smooth consistency if that’s what you prefer.

Bring back to the simmer – now you can judge whether more stock needs to be added. Just add more until the texture is to your liking. Make sure you have a taste and season with salt and freshly ground black pepper.

Serve drizzled with some olive oil and shavings of parmesan cheese.

This soup really is a meal in a bowl and also makes a fantastic lunch. You can freeze it too, if you want – but I find this one disappears out of the fridge pretty quickly!

My Groovy Kitchen Tunes track for this warm, nutty soup would have to be Dark Storm, by The Jezebels. Its title is reflective of our weather here in Victoria at the moment, but there’s something warming and hopeful about it at the same time. Curl up on the couch tonight in front of the TV, pop a blanket over you and enjoy this soup and just think, the weekend is nearly here!! Sounds like a perfect Wednesday night to me 🙂

Fabulous side dish: Smashed potatoes


Side dishes are a real challenge for me, and I think for a lot of people. You know the main thing you’d like to cook – some simply grilled fish, a nice roast chicken or even a steak – but I’m always asking myself “but what are we going to have with it??”

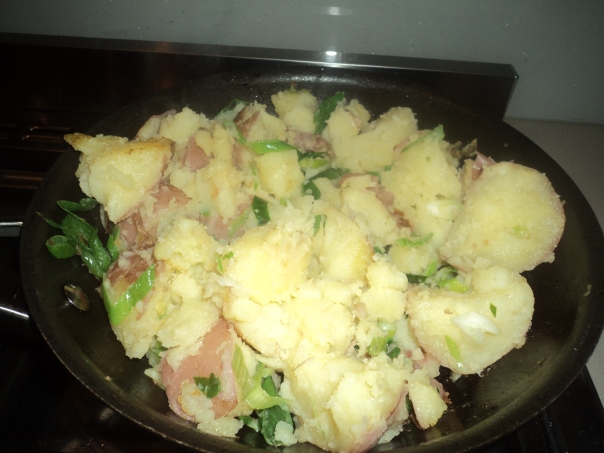
So, I’ve been road testing a few side dish ideas, and this one is awesome 🙂 Smashing the potatoes gives great texture, and I made this with bacon and spring onions – all great friends of the humble potato. This isn’t a pretty dish, but it’s full of flavour, simple and will compliment many different dishes. I love mashed and baked potatoes – but this is a nice change.

SMASHED POTATOES

  • 4 deseree potatoes
  • 3 rashers of bacon, sliced into chunks
  • 2 spring onion stalks, chopped
  • 2 knobs of butter
  • a little olive oil
  • Salt and freshly ground black pepper

Method

Score the potatoes with a knife and cook in the microwave for 7 minutes, or until soft and tender.

Place a non-stick pan over a high heat and add enough olive oil to cover the pan. Place the potato on a plate and using a fork, smash it until it had broken up, but it still chunky. Add the potato to the hot pan, using a spatula to press it down.

Scatter the bacon on top and place small pieces of the butter across the top of the potato and bacon. Season generously with salt and pepper.

Cook until the potato is golden at the bottom, then use the spatula to turn the potato and bacon over, to allow it to brown on the other side. The potato will break apart as you do this. Don’t stress, that’s what’s supposed to happen.

Once the bacon is cooked and parts of the potato are crispy – it’s ready to serve with your favourite meal.

Hope you enjoy this recipe. As I said, it’s not pretty, but mostly importantly, it’s yummy, relatively quick and something a bit different.

What kinds of side dishes do you normally cook? Are you sometimes left stumped for ideas? Leave a comment below and share your thoughts!

Be Inspired~

Lisa

Mystery solved!! Why kids (and adults) won’t eat vegies


When I was consulting my expert about what vegetables are in season for this blog post, I dreaded to mention the one at the top of the list. This poor little guy has such bad PR, I thought all my readers would be driven away – perhaps forever!

But, if everyone could look past their childhood nightmares and give this little vegie of goodness the love it deserves – I promise you and your kids are very, very likely to enjoy them (I won’t say definitely, because there are no guarantees in life!).

In fact, I know many people who HATE a plethora of vegetables. More commonly: Cauliflower, broccoli, pumpkin, beans, peas (I admit, this is the only real vegetable I don’t like), spinach/silverbeet …

And finally, the subject of today’s post:

BRUSSEL SPROUTS!

I know most of you are making a face at your computer screen right now and are tempted to just click the ‘close’ button and think of happier things, like chocolate … but please, read on, especially if you are a parent who is trying to get your kids to eat any sort of vegetable, even the ones you know you don’t even like … like Brussel sprouts.

I actually don’t think I know anyone who loves these little green balls – other than myself and my mum. The rest of my family happily eat them – but mum and I LOVE them … and do you know why?

Well, it’s all about how they are cooked! My mum had a real knack with cooking vegetables when we were kids (she still does!) – and this made our perception of them totally different to that of most of the kids I grew up with – and so many of the grown ups I know today.

I realised that it’s actually quite common for people to dislike or refuse to eat a whole range of vegies. I was surprised! But once I asked them why, a pattern started forming. Most people didn’t like vegies like Brussel spouts, brocoli and cauliflower because they thought of them as soggy and tasteless. This tells me that their issue has nothing much to do with the vegetables themselves.

It’s the cooking process that’s the problem, with most people I spoke to recalling how their mum’s boiled them forever in a pot of water on the stove, or had made the poor food do a few to many circles in the microwave. They were then plonked on the plate, with no love, care or attention (also known as seasoning). I mean look at this piece of broccoli as an example … who would want to eat this sorry-looking soggy thing? 

YUCK!!

But if you were served this … do you think you’d feel a bit differently about putting it in your mouth?

 Doesn’t this look so different to the first example?

Now if you aren’t a lover of these vegetables now, because you are used to boiled lumps of yuckiness – then I know even the latter version probably doesn’t look like a meal made in heaven. But I can tell you this now, with some love, in the form of sauteing these babies in a frying pan with some olive oil, pieces of bacon and some salt and freshly ground black pepper and a twist of lemon juice – you are VERY likely to enjoy every floweret of flavour they have to offer.

Don’t make your kids eat the same boiled crap you did when you were a kid. Just because it’s a side-dish and it’s healthy, it doesn’t deserve some care and attention before making it to the plate. It takes hardly any more time to inject a little flavour – and best of all – it’ll take less time to cook them too. A slight crunch and the bright, vibrant green colour is what you’re after, and it only takes 3 or 4 minutes to achieve it – not 10 or more in the microwave.

Now to share my mum’s trick with Brussel sprouts:

  • 15 Brussel sprouts
  • 1/4 cup of water
  • 1 chicken stock cube
  • 1 heaped tablespoon of butter
  • freshly ground black pepper, and salt, to taste

Method:

Remove the outer leaves from the sprouts, especially if they look a bit discoloured. Remove the stalky bit at the bottom and then chop the sprout into three pieces.

In a medium saucepan, place the spouts, water and chicken stock over a high heat, until the water starts to steam and boil. Stir the Brussel sprouts around in the water a stock cube mixture. They will start to loosen and go bright green. Do this for about 4 or 5 minutes, or until the spouts are tender BUT NOT OVERCOOKED!! You won’t need to cook them for longer than 7 minutes.

Take the spouts off the heat, and add the butter, pepper and you can add some salt, if needed (the stock cube would have added some salt).

Serve with your favourite meat. I love these with a nice juicy steak. This cooking method also works well for broccoli too 🙂

I know there are a million recipes you’d rather try before you do this one – but I promise, it’s super yummy! I know the butter adds calories to what would otherwise be a healthy meal – but if you can’t get anyone to eat their vegies, a bit of butter to ensure they get all the vitamins and minerals of foods like Brussel sprouts and broccoli – then I reckon it’s worth it. This is the method my mum used to get my brother and I to LOVE our vegies. I know she was really on to something here!

Do you think you’ll give this a go with your kids, and for some vegies you don’t like? What things have you tried before to make vegies more yummy? Leave your comments below. I’m sure there’s plenty of people who would love your tips too!

Be Inspired~

Lisa

Creamy mashed potato – just how it should be


Think mashed potato is boring? Done the right way, it’s anything but!

I know a lot of people who grew up with sloppy, lumpy horrible mash served with so many meals that it became the most undersirable thing on the plate. Usually it was served this way because it was quick, easy and cheap.

But, I implore you – don’t put your kids through eating horrid mash every night! Cook it like this and I can promise you, there won’t be a morsel left on the plate.

Now I know, it’s got a lot of butter, cream and cheese and it’s totally unhealthy. But who cares! This shouldn’t be a side dish you make every night. It should be savoured for the odd meal here and there – served with lamb shanks or a delicious hearty casserole on a cold night.

Once you make this – you’ll never let old school mash pass your lips again!

Creamy Mashed Potato

  • 4 or 5 large deseree potatoes
  • about 25 to 35 gms of sofened butter
  • about 1/4 of a cup of full cream milk
  • 3 tbs of cream
  • 1/4 cup of parmesan cheese
  • salt and pepper to taste

Method

Peel, wash and chop your potatoes. Place them in a saucepan with enough cold water to cover them, along with a few good pinches of salt. Bring to the boil and simmer until potatoes are tender.

Drain the water away and using a metal whisk, break up the potatoes (make sure they are still piping hot when you start this – the texture won’t be right if they are cold). Add the butter and milk and start to whisk. It’s a bit of tough work at the start, but the whisking makes the potato light and lump-free. Add the cream, and a little more milk if the mash is too thick and whisk until combined and smooth. Add your parmesan, salt and pepper and mix well again. Make sure you taste it at this point. Add more butter, salt, etc, dependent on your tastes, but it should taste buttery, creamy and delicious.

 Uforic Food now has its very own Facebook page. Visit it here and don’t forget to ‘like’ us!

Stay tuned for Friday’s The Weekly Cook Up where we’ll be talking marinades!

Be Inspired~

Lisa

Dinner party part 2: Cous Cous salad


One of the many dishes I whipped up on Saturday night was this cous cous salad. And while it looked and tasted yummy – the leftovers have also served us very well for lunches over the past few days, topped with the leftover barbecued marinated  lamb backstrap.

Cheers!!!
Cous Cous Salad 
  • 1 cup of chicken stock
  • 1 cup of couscous
  • 2 tsp olive oil
  • 1 red onion, halved and finely diced
  • 1 garlic clove, crushed
  • 1 tsp ground cumin
  • 1/4 tsp ground cinnamon
  • 1/4 tsp ground turmeric
  • 2 large  ripe tomatoes, finely diced
  • 1 x 400g can chickpeas, rinsed, drained
  • 1 handful of chopped fresh coriander
  • The juice of half a lemon
  • freshly ground black pepper
  • Method

    Place the stock in a medium saucepan and bring to the boil. Remove the saucepan from the heat and add the cous cous to the hot liquid. Stir with a fork until combined. Cover and set aside for 5 minutes or until all the liquid is absorbed. Fluff the cous cous with a fork to separate the grains.

    Heat the oil in a non-stick frying pan over medium heat. Add the onion with a little salt and cook, stirring, until onion softens. Add the garlic, cumin, cinnamon and turmeric and cook  for 30 seconds or until fragrant. Add the tomato and chickpeas and cook until heated through. Remove from heat.

    Add onion mixture, coriander and lemon juice to the couscous and toss gently to combine. Taste and season with pepper.

     The lamb backstrap is awesome with this as a side dish – or for a really yummy, healthy lunch.

    Tomorrow I’ll be sharing my beef shazlick marinade. Simple, fast and tasty.

    Be Inspired~

    Lisa


    Market update #1:Water and rain devastates farmers, banana prices skyrocket


    Natural disasters, including the floods in Queensland, New South Wales and Victoria, as well as Cyclone Yasi have directly or indirectly effected everyone in Australia, whether you have battled the water and winds first hand, know someone who has, or been touched by the stories you have read and seen on the news.

    Another group of people who have been horribly effected by these tragic events are our farmers – the people who grow our food.

    Because of this, we have already begun to notice food prices rising – with 70 per cent of the banana crops in Queensland flattened by Yasi – it’s not unexpected.

    The floods have also caused havoc for fruit and vegie growers, and in many cases not only have we seen a change in quality of our fresh produce, but we have also seen the prices climb.

    My brother, Dave Foreman knows this first hand, as the owner of a fruit, vegetable and gourmet food shop – Anglesea Fruitz.

    He has all the inside knowledge on everything that is fresh produce, and so Dave and I are going to join forces with his knowledge of the industry and my passion for food, cooking and writing, to bring you the latest updates from the markets.

    We’ll tell you why your produce doesn’t look quite as it used to before the floods and wind hit, why the prices are high, when the best time is to buy and what is coming into season. I’ll also have plenty of great recipes to help you take advantage of the produce that is best in quality and price. You will see that eating seasonally is not only going to ensure you are eating the yummiest fruit and veg – it’ll also help you save some dollars too.

    “At the moment the prices of bananas for me is about $60 a box, a doubling in price overnight  and there is limited supply” Dave said.

    “It’s not a bad idea that if you find a good price, stock up on the greenest bananas you can find and keep them at between 10 and 11 degrees to prolong their life.”

    Dave said other fruit to be effected includes avocado, all melons, pineapple, mango, paw paw and papaya – basically anything tropical.

    “Get down to your local greengrocer now and stock up before it gets worse,” he said.

    We also want to highlight that supporting your local growers and fruit and vegetable shops is the way to go. With shortages across the country right now due to the floods, and now Cyclone Yasi, large retail chains are looking to import fruit and vegetables from overseas.

    Our local producers may be struggling – but this is a time when they need our support the most. So make a stand – don’t buy from large retailers that choose to important. If it’s not in season or in good condition locally – buy something else that is and support our farmers by shopping at your local greengrocer, farmers markets etc.

    Subscribe to Uforic Food by putting your email address in the email subscription box on the left (you will then be sent an email asking you to confirm your subscription) to receive regular market updates in your inbox, as well as great recipes to make the best of your fresh produce during these tough times for everyone.

    Be Inspired~

    Lisa

    Lisa Foreman is a former journalist, now a passionate lover of food, cooking and writing.

    Dave Foreman is the owner of fruit, vegetable and gourmet food shop, Anglesea Fruitz, on the Great Ocean Rd at Anglesea, Victoria. He is also Lisa’s brother.

    Day 28: The secret to perfect roast potatoes


    I have been experimenting with different methods for cooking roast potatoes for many years now and after much trial and error – I’m very proud to say that I have nailed it with a method that works every time.

    But it’s been a long road to get to this point and I have tried so many different ways including heating the oil in the pan before adding the potatoes – a method that is quite a hazard with hot oil spitting everywhere.

    I have par boiled, not par boiled, microwaved and steamed the potatoes before roasting. I have tried peeling and leaving the skins on. I have even cooked “roast” potatoes in the frying pan hoping this would make them crisper. It kind of worked, but if you fry them, they aren’t really roast potatoes, are they?

    I have even tried many different varieties of potato in my pursuit for roasting bliss – Pontiac, sabiago, deseree, coliban – you name it, I’ve tried it!

    As a result I’ve had potatoes that have turned out everything from burnt on the outside, but hard in the middle – soft on the inside, but with little colour on the outside etc

    Being such a lover of roast potatoes, I knew I had to get it right. I mean I would skip a roast meal all together if I couldn’t have these little golden pieces of deliciousness with them. 

    But I’ve found one that gives me a crispy on the outside and soft in the middle result every time – but I won’t keep the secret to myself, especially seeing as Christmas is almost here and most people’s festive table is not complete without this side dish.

    So, here goes!

    Lisa’s Perfect Roast Potatoes

    • 2 kilos of deseree potatoes
    • 1/4 cup of olive oil
    • Sea salt and freshly ground pepper
    • 3 whole, unpeeled garlic cloves
    • 3 sprigs of thyme

    Method:

    Preheat the oven to 220 degrees (c).

     Peel and cut 2kg of desiree potatoes into 4cm pieces. Place potatoes in a large saucepan and pour over boiling water.

    Once the water has come to the boil, cook for 6 minutes over medium heat. Drain.

    Return the potatoes to the pan, place a lid on the pan and shake vigorously (this roughs up the surface and is the key to getting nice crispy bits on the finished product. I sometimes also run a fork over the potatoes to rough them up gently.

    Place in a roasting tin and season with generous amount of sea salt and pepper.

    Drizzle the olive oil over all of the potatoes and them add the garlic and time. Using your hands, toss the potatoes though the olive oil and herbs, ensuring every part of the potatoes are covered. Use a little more olive oil, if required.

    Place the roasting tin on the middle shelf of your oven and cook for 40 to 50 mins, turning occasionally.

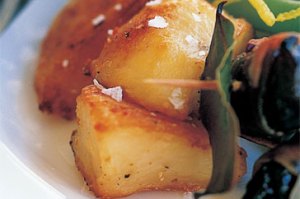
    For the best results, serve the potatoes immediately. If you allow them to sit, they will become soggy.

    I promise you, once you try this recipe, you’ll never search for another. Perfect every time!! YAY!

    Be Inspired~

    Lisa

    Day 12 – Brew your own stock


    Day 12 of the Inspiration Challenge has arrived and today I’m going to say that everyone should be making their own stock.

    However, I do wholeheartedly admit that I sometimes use stock that comes in a carton and I even sometimes use stock powder. If you told a chef about this, then they would probably have a hissy fit! But hey, lets face it – we’re all busy people and we don’t always have time to brew up our own stock of a weekend.

    In saying that, making your own is incredibly rewarding and sooo much healthier and tastier then the stuff from the supermarket. The other great thing is that you can make it in a massive batch and freeze it for later use – which is very, very convenient and when stored this way, is just as fuss-free as the non-homemade stuff.

    So next time you have some free time, I urge you to make your own stock. I have a basic vegie stock recipe that I use – and then I just add the relevant bones I want depending if I want chicken, beef, lamb or fish stock.

    Basic Stock


    – 3 stalks of celery – roughly chopped (include top leaves for extra flavour)
    – 3 carrots – roughly chopped
    – 2 large brown onions, unpeeled, roughly chopped
    – 1 handful of fresh parsley
    – 2 leeks (use only white parts) roughly chopped
    – 3 cloves of garlic – crushed
    – 8 pepper corns
    – 2 bay leaves
    – A few good pinches of sea salt (to taste)
      
    Add about 1kg of beef or lamb bones, or 2 chicken carcases – depending on what kind of stock you want to make.
     
    Combine all ingredients in a large saucepan and pour over 4 litres of cold water.
    Cover and simmer gently for about 1 hour.
    Remove from heat and strain into a clean bowl, pressing the vegetables to extract the flavour.
    Make sure you taste the stock at this point and adjust the seasoning to taste.
     
    You can use the stock from this point – however, unless I’m using vegetables only – I like to let the stock cool – transfer it into an appropriate container and then refrigerate overnight.
     
    What then happens is any fats in the stock rise to the top and harden flightly. It’s easy to then get a large spoon and skim the yuckiness of the top. This makes the stock taste clean and lovely, and ensures you don’t eat all that fat!
    These stock are so versatile – they can be used for soups, risottos, casseroles – anything and anything really.
    Be Inspired~
    Lisa


    Day 6: Baked Potatoes – Darwin style


    Darwin is a regular inspiration for me when it comes to food and there are several dishes I seek out during every visit. One of those is paw paw salad – a Thai dish made up of grated paw paw, crushed peanuts, chilli and fish sauce (and maybe a few other things I can’t distinguish). It tastes like nothing I have ever eaten before and I haven’t yet found it ‘down south’.

    I also have never found a laksa in Victoria as good as the ones you get at the markets in Darwin.

    I haven’t successfully recreated either of the above dishes. I have spent hours making laksa and have never mastered the balance of flavours.

    However, my other staple Darwin dish is baked potatoes from the Potato Man cart at the Mindle Beach Markets

    My mum has always been a great lover of these too and so even when we lived in Darwin, mum and I would make them regularly at home.

    Now I know you can get baked potatoes with all the trimmings everywhere you go – but there is a big difference. Most places you go to use cold salsa rather than hot bolognese sauce.  The difference in sauce makes a huge different to the overall flavour. The cheese never starts to melt with cold salsa and I just don’t think it’s anywhere near as nice.

    Give the Darwin-style potatoes a go – I promise they’ll be something the whole family will love.

    Baked Potatoes – Darwin Style

    (Serves 4)

    Pre-heat oven to 200 degrees (celcius)

    • 4 Large potatoes, with skin on (use a variety ideal for baking like desiree, nadine, colban or serbago)
    • Olive oil
    • salt and pepper

    Score each potato a few times on the top using a knife, and pop in the microwave on high for 7-10 minutes (depending on the size of the potato)

    You want them to cook until they are becoming soft on the inside – check this by inserting a knife. If they are still hard, increase the cooking time a little longer.

    Once the potatoes are done, lie four squares of aluminium foil on your bench and pop one potato in the centre of each square. Drizzle each with a little olive oil and season with salt and pepper.

    Wrap in the foil and place in the oven for about 45 minutes. While the potatoes are cooking, make the sauce.

    The sauce

    • 1 large onion, finely chopped
    • 3 rashers of bacon, chopped
    • 2 cloves of garlic, finely diced
    • 500gm of minced beef
    • 1 tsp of dried oregano (or similar Italian-style seasoning)
    • I glass of white wine
    • 2 400gm cans of chopped tomatoes

    Method:

    In a heavy based pan on a medium heat, cook the bacon with a little olive oil until it becomes slightly crispy. Add the onion and a few pinches of salt. After 3 minutes, add the garlic and cook for one minute.

    Add the mince and break it up using a wooden spoon. Add the oregano (or similar) and cook until the meat has browned (about 10 minutes).

    Add the white wine and simmer for a few minutes. Add the canned tomatoes, season with salt and pepper to taste.

    Bring to a low simmer and cook for about 30 minutes.

    Now for the toppings!!!!

    Now there are four other things that I have to have on my potato, other then bologese sauce.

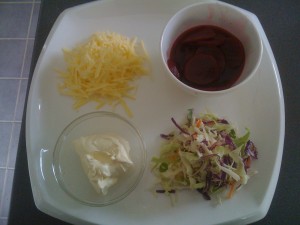
    • Grated tasty cheese
    • Sour cream
    • Coleslaw (without dressing – I get this in a packet from the vegie section at the supermarket)
    • Beetroot

     (Other possible filling include avocado, pineapple – basically you can let your imagination run wild!)

    Unwrap the potatoes from their foil and place in a bowl. Cut open with a knife.

    Then you need to start assembling – everyone can do their own and add whatever toppings they like.

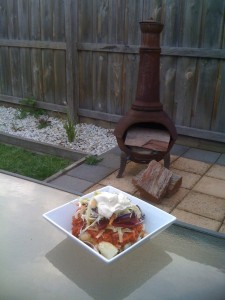
    For me, I put a good amount of bolognese on top of the potatoes, followed by a good amount of the cheese. Next comes the coleslaw, beetroot and finally a good dollop of sour cream.

    This dish is colourful, tasty and one I promise your whole family will love. Why not serve it up at your next family dinner … it’s a great dish to do when you have a lot of guests.

    Be Inspired~

    Lisa

    Tagine – full of fabulous flavour – and it’s vegetarian!


    Hello again!

    I know it’s been a while between posts – so I thought I’d return to the blogging world with something a little out of left field – well, it’s not all that unusual – it’s just that I admit I am a little scared of any dinner dish that doesn’t contain meat – cos I love it!! But vegetables are totally amazing – so I thought, why not try a recipe without meat? So, I did, and it was soooo worth it! Of course I thought anything with that amount of spices in it would have to be wonderful – so why not give this a try. I found it on The Age’s Epicure site – so I admit it isn’t one of my own creations – but it was too good not to share with you 🙂


    Ginger and Vegetable tagine

    • 1/2 cup olive oil
    • 3 medium spanish onions, finely sliced
    • 3 garlic cloves, finely sliced
    • 3 tbsp fresh ginger, finely sliced or grated
    • 2 bay leaves
    • 1 tbsp coriander seeds
    • 1 cinnamon quill
    • Salt and ground white pepper
    • 800g tin whole peeled tomatoes
    • 400g tin chickpeas, drained
    • 1 tbsp preserved lemon rind, finely sliced
    • 1kg sweet potato, peeled and cut into 11/2 cm cubes
    • 1 red capsicum, cut into squares
    • 2 handfuls coriander leaves

    Method:

    Preheat oven to 180C. Heat oil in a large heavy-based saucepan or a tagine. Add onion, garlic, ginger, bay leaves, coriander seeds and cinnamon and season well. Cook over medium heat until soft and starting to colour, about 15 minutes. Add tomatoes, chickpeas and lemon rind and bring to a simmer. Add sweet potato and capsicum and stir. Cover with a lid and bake for 1 hour or until sweet potato is cooked through. Garnish with coriander leaves and serve with couscous and natural yoghurt.

    So there you have it. I think this would also be great with some simply grilled chicken on the top – if you can’t bare to go without meat.

    Seeing as I am posting a vegie recipe – I will unashamedly give a plug to my brother and dad’s fruit, vegetable and gourmet foods shop in Anglesea, Victoria – Anglesea Fruitz. You can buy every single ingredient you need from there, including the spices from their awesome new range of Australian-grown dried herbs. So, if you’re holidaying in Anglesea, pop in and have a look at the amazing range of fresh and gourmet produce – I get inspired every time I go there 🙂