Blog Archives
The Weekly Cook Up: Morrocan Beef Tagine
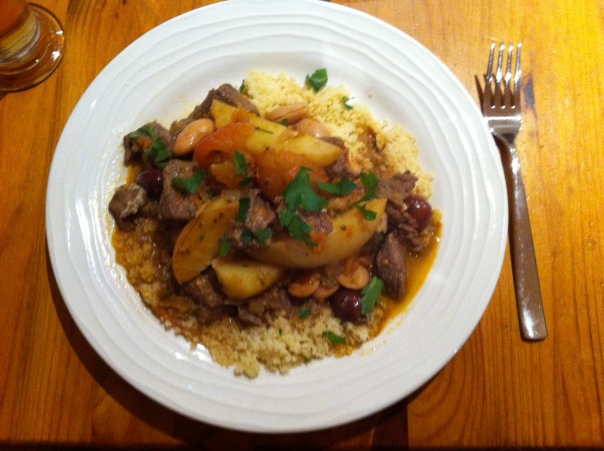
Moroccan food, in my book, is absolutely gorgeous. This tagine is no different because it’s filled with delicate flavours, amazing freshness and the pangs of yumminess that come from lemon and olives.
I admit, there are a few ingredients in this dish – but that’s why it’s a Weekly Cook Up recipe. It needs a little love and time to ensure you are left with a succulent, tender and flavourful dish.
I generally get annoyed when people call dishes like this a tagine – when they didn’t actually use a tagine to cook it in. I mean, that’s the whole point! So, I apologise to myself right now. I am calling this a tagine, because the flavours deserve that title. I didn’t have mine handy because we were house-sitting for my brother and his girl while they were off sunning themselves in warmer places of Australia. Also, this is a large batch, which will serve 6 to 8 to allow for freezing, so it wouldn’t probably fit in a tagine anyway. Feel free to halve the quantities and break out your tagine, if you have one. They are definitely a worthwhile investment.
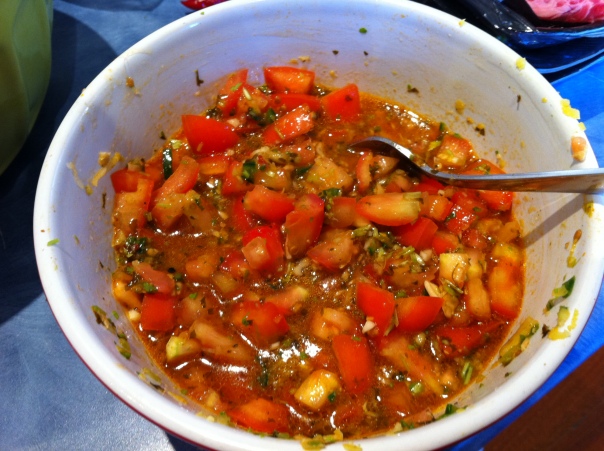
You will see below that the first component of the recipe involves making a chermoula. This is like the equivalent of a curry paste – but in this case the consistency is more like a watery salsa. This is a critical step in making this dish as it’s where you start to build the flavour base. Keep in mind when making this dish that you really need to marinade the meat for about two hours after adding the chermoula.
Beef Tagine with Lemon, Olives and Coriander
Chermoula
-
6 tomatoes, finely diced
-
3 tbs of fresh coriander root, finely chopped
-
the zest of a whole lemon
-
the juice of half a lemon
-
2 cloves of garlic
-
1 large green chilli, finely chopped
-
2 cm of fresh ginger, peeled and finely chopped
-
2 tsp of Moroccan spice paste (I used Dave Bittons – but there are others available in the spice section at the supermarket)
The tagine
-
2 kg of chuck steak – trimmed of excess fat (but leave a bit on for tenderness and flavour). Cut into 2cm cubes
-
1 large red onion, finely chopped
- 3 large tomatoes, cut into wedges
-
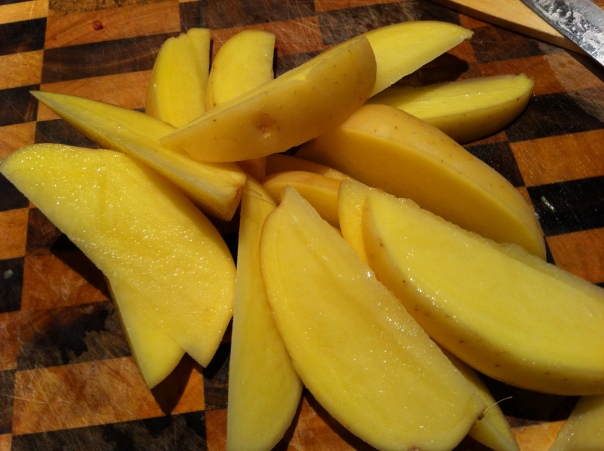
2 potatoes (I didn’t peel them, but you can if you prefer) cut into wedges
-
1/2 a cup of water
-
1 cup of green pitted olives (you can use kalamata, if you like)
-
4 tbs of chopped, fresh coriander
Method
Combine all the ingredients for the chermoula.
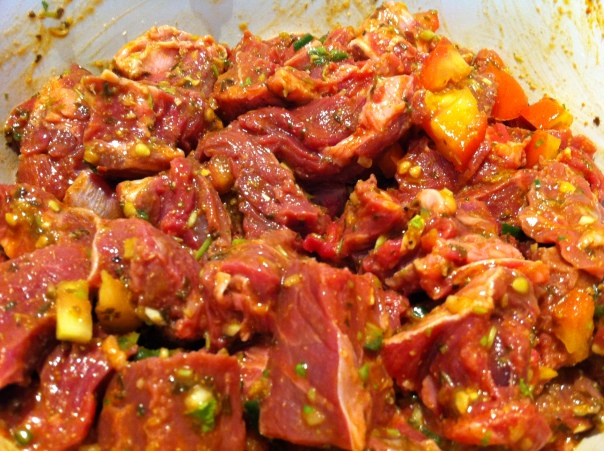
Place half the chermoula in a bowl with the meat. Mix thoroughly and seal both bowls with cling film and place in the fridge for an hour – 2 if possible to allow the flavours to meld and marinate.
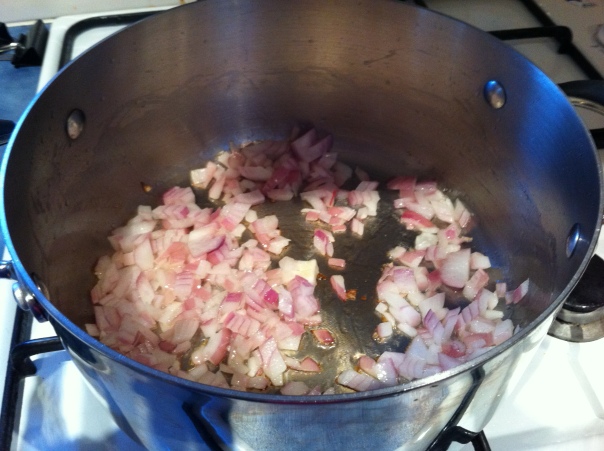
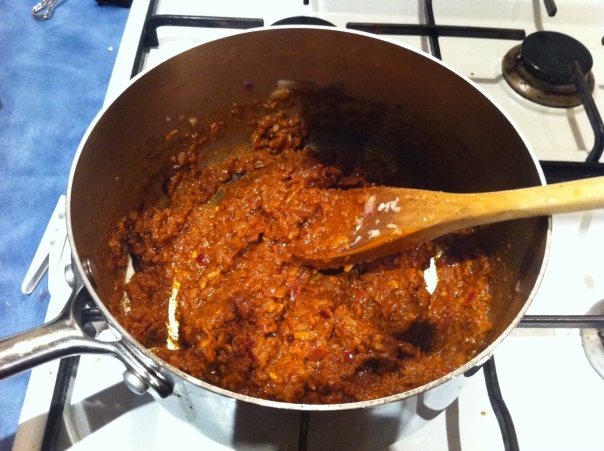
Take the meat and chermoula out of the fridge and set aside. Meanwhile, heat some oil in a large, heavy-based pan and add the onion, cooking over a medium heat until nice and soft.
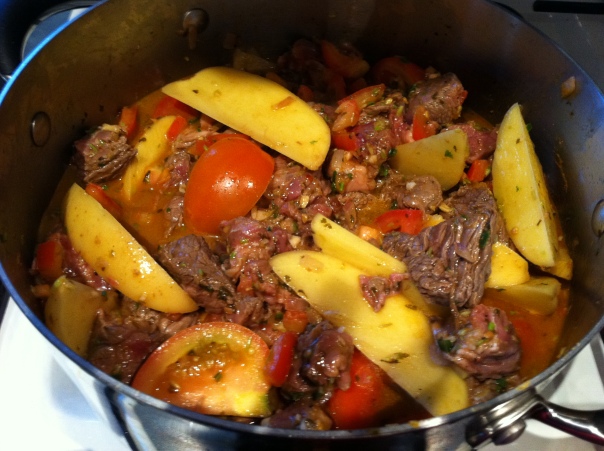
Add the meat, the remaining chermoula as well as the tomatoes, potatoes and water.
Bring to the boil, cover and simmer over a very low heat for about two hours, or until the meat is lovely and tender. Add the olives, allow to heat through for a minute or two. Add the fresh coriander, then serve.
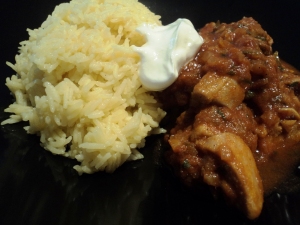
Serve with cous cous and some nice crusty bread.
This dish has amazing layers of flavour that will dance in your mouth. The soft, fluffy cous cous soaks up the juices perfectly. This really is an awesome dish.
As for my music recommendation – One Republic was definitely a feature of my playlist while I was making this. Make sure you look up their albums – but one of my favourite songs is called Lullaby. It’s a song about home, about feeling safe and content. Have a listen below. It’s a really beautiful song.
The tagine will freeze well for up to three months. Seeing as it’s the Queens Birthday long weekend, why not spend some time whipping up some dishes like this to freeze to make your life easier when work and life gets crazy again! Check out The Weekly Cook Up for more inspiration. Other than cooking – what are your plans this long weekend? I’m working at my brother and dad’s shop, and relaxing with my finacee. No doubt there’ll be some cooking going on too 🙂
Butter Chicken – the weeknight version
Butter chicken is one of those curries that won’t scare those opposed to heat and is great for kids. Not a chilli in site!
While curries are a bit famous for taking a very long time to cook – this version is actually quite quick (on the table within 40 minutes, including preparation) and doesn’t require going to the supermarket to purchase 10 different kinds of spice.
It’s a bit of a cheats version – but don’t let anyone make you feel guilty for that! This uses a store-brought mild curry paste. Some brands of these are better than others. I find Sharwood to be superior and the flavour is really fantastic. It’s all fine to spend a bit of time on the weekend grinding up your own curry paste, but it’s not something for during week.
You’ll notice that the quantities are enough to feed a small army – and that’s because I was cooking it not only for our dinner, but also as additional meals for my dad to put in his freezer.
So, why not cook a large batch – serve it up for dinner, then pop the rest in an air-tight container for the freezer. It’ll give you a night off when you can’t face cooking.
Butter Chicken
- 3 heaped tbs of mild curry paste (Sharwood is my prefered supermarket variety – but there are fabulous ones at Indian supermarkets)
- 2 large red onions, finely diced
- 3 cloves of garlic, finely chopped
- 2cm nob of ginger, finely chopped
- 1 tbs of dried ground coriander
- 2 tbs of tomato paste (this is a key ingredient, not only for flavour, but colour as well)
- 2 kg of chicken thigh fillets, chopped into 2cm cubes
- 500ml of thickened cream
- 1/2 a cup of water
- 1 large handful of chopped, fresh coriander (optional)
Method
In a large, heavy-based saucepan add the paste, onion, garlic, ginger, tomato paste and dried coriander and cook until the spices become fragrant, about five minutes. If they start to burn and catch on the bottom of the pan, add a little water.
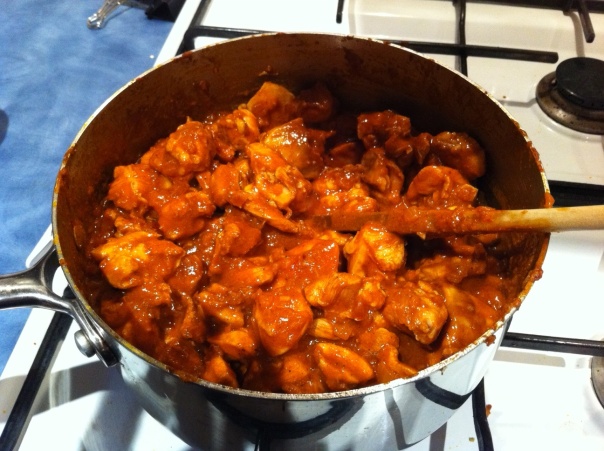 Add the chicken and cook over a medium heat, stirring regularly, until the chicken’s juices start to loosen the mix. This will take 5-10 minutes. Add the water and the cream and stir well. Allow to simmer over a low heat for about 10 minutes, or until the chicken is cooked and the curry is a lovely, rich orangey colour. Add the coriander, if using. and season to taste with salt and pepper.
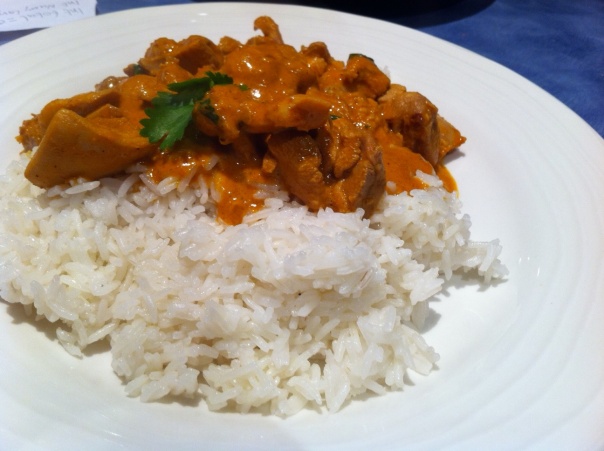 Serve with basmati rice and pappadums or naan bread, if you have it handy!
My Groovy Kitchen Tunes track choice for the cooking of this recipe would have to be something warm and comforting, just like this dish. As soon as this song comes on, I can’t help but smile, which is how I feel when I put the first fork full of butter chicken in my mouth. The Temper Trap is my new absolute favourite band right now, in and out of the kitchen! Their album Conditions was a big feature of the playlist at our engagement party in May. Their incredible – as is this song – Fader. Have a listen!
The Weekly Cook Up – Irish Stew

Irish stew is a casserole that has been the key to keeping hungry people’s tummies warm and full for a very long time.
It’s simple to make, with few ingredients and is ideal for your slow cooker. The first time I ever ate it was at an Irish pub in my hometown of Geelong – and once I’d had it, I couldn’t wait to re-create it. So, this is my version of a very, very famous stew. There’s no spice and kids are sure to like its gravy flavour. Irish stew also only has meat, carrot and potato, so no need to negotiate with them to eat anything too fancy, weird-looking or green, for that matter.
This freezes extremely well, so why not whip up a batch this weekend.
Irish Stew
-
1kg lamb four-quarter chops, cut into bite-sized cubes
-
1/2 a cup of flour, which has been seasoned with salt and pepper
-
2 large onions, peeled and finely chopped
-
3 carrots, peeled a cut into large chunks
-
3 large deseree potatoes, peeled and sliced into large chunks
-
Enough beef stock to cover everything (about 1 litre)
-
1 tsp of fresh thyme leaves
- 3 tbs of Worcestershire sauce
-
Salt and pepper to taste.
Method
Place the flour, salt and pepper in a zip lock bag and added the cubes of lamb. Close the bag and toss to coat the lamb with flour.
Heat some oil in a large, heavy based casserole and cook the lamb in batches until it is sealed and brown on the outside. Set the lamb aside.
Add a little more oil to the pan and cook the onion until it is soft and translucent, about 5 minutes.
Add the lamb back into the pan, along with all remaining ingredients.
Bring to the boil, cover and reduce heat to very low. Simmer for two hours, checking and stirring occasionally. At the end of the cooking time the sauce should be nice and thick and the vegies and meat nice and tender.
If using a slow cooker, add all ingredients to the ceramic dish and cook on high for 3 hours, or on low for 5.
Serve with some nice crusty bread and a big glass of your favourite red wine.
The Weekly Cook Up: Spezzatino di manzo (Italian beef stew)
My mother-in-law-to-be whipped this up for dinner on Monday night, and it was so super tasty, I just had to share it with you.
It does take more than 2 hours to cook – but the meat was so tender and succulent and the pancetta and wine added so much beautiful flavour. What can I say, I just loved every mouthful – and I’m not just saying that to get brownie points with my future in-laws 🙂
I know most of us don’t have time to do this on a weeknight – but it’s a perfect weekend meal, and with a fancy name like Spezzatino di manzo – your friends are sure to be impressed if you served this up at your next dinner party. It’s also an ideal recipe for The Weekly Cook Up, because it can be cooked and frozen in preparation to take the pressure off later in the week when time is more precious.
Spezzatino di Manzo (Italian Beef Stew)
-
1/2 a cup of plain flour
-
1.5kg of chuck steak, cut into 5cm pieces
-
1/4 cup of olive oil
-
100gm of pancetta, cubed
-
2 carrots, finely diced
-
2 sticks of celery, finely diced
-
1 brown onion, peeled and finely diced
-
2 garlic cloves, crushed and chopped
-
1 cup of dry white wine
-
400gm tin of chopped tomatoes
-
1 1/2 cups of beef stock
-
1 tbs of chopped, fresh rosemary
-
1 tbs of chopped, fresh sage (or 1 tsp of dried)
-
2 tbs of capers, rinsed, drained and chopped
-
1/4 cup of flat leaf parsley, chopped
Method
Place flour in a large freezer bag and season with salt and pepper. Add beef and shake to coat.
Heat 1 tbs of oil in a large, heavy-based pan over a medium to high heat and brown the meat, in batches, until it’s all browned and sealed. Set aside.
Add a little more oil to the pan and fry the pancetta, carrot, celery, onion and garlic for about 5 minutes, or until soft.
Turn up the heat and stir in the wine, scraping the bottom of the pan to remove the nice, flavourful brown bits at the bottom.
Stir in the beef, tomato, stock, rosemary and sage and bring to the boil.
Reduce the heat to low, cover and simmer for 1 hour and 20 minutes. After this cooking time, remove the lid for a further 40 minutes, allowing the sauce to thicken.
Finally stir through the capers and parsley and check the seasoning, adding salt and pepper to taste.
Serve with some yummy, creamy mashed potato.
Be inspired~
Lisa
The Weekly Cook Up: Australian fusion food
Aussie food to me is all about fusion. Australia is a multicultural extravaganza of flavours from across the world, reflecting our population – people who have come together from all over the world to call this beautiful country home.
In the 1950s you might have said Australian cuisine was about meat pies, fish and chips, snags on the barbie, the Sunday roast … and, of course, let’s not forget Vegemite!
But since then our pallets have been wowed by the fabulous flavours of countries like Italy, China, India and more recently, the wonder that is African food.
As you walk down the streets of any of Australia’s beautiful states and territories, you are spoilt for choice when it comes to world cuisine – and then there are those restaurants which classify themselves as “Modern Australian”.
It is this term which I think really encompasses what Aussie food is all about in 2011. It’s about flavours and techniques from across the world coming together to compliment and enhance the things we love and do well here, like seafood, lamb and chicken and an array of fresh produce.
I also think it’s important to embrace indigenous culture and flavours and bush herbs such as lemon myrtle, which is a feature of my recipe, have become really popular.
World famous chef Rick Stein’s pursuit to find Australia’s Top Food Blogger and the country’s ultimate dish inspired me to create this recipe. It embraces our wonderful produce, and the flavours and techniques from all over the world which has influenced our cuisine so much.
The chicken in this recipe is succulent and infused with the flavours of basil and lemon myrtle. The potatoes are crispy and delicious, just like you’d expect from a perfectly cooked Sunday roast. The sausages give a really authentic Aussie touch, with a Balkan twist, and the beans don’t only add colour, but a crispy freshness. When brought together, it’s un unpretentious dish that is fragrant, moist and bursting with flavour.
In a nutshell – it’s the kind of food everyone just loves to eat.
BAKED FUSION CHICKEN

Serves 6-8
Marinade:
- 16 organic chicken drumsticks (you could also use maryland or thighs, if you like)
- 2 tbs of basil pesto
- The juice of 1 lemon
- 1 tsp of lemon myrtle
- 2 cloves of garlic, grated
- 1 tsp of sea salt
- 1 tsp of freshly ground black pepper
- 3 tbs of olive oil
Combine all of the marinade ingredients. Massage into the chicken, cover with cling film and refrigerate for at least 2 hours.
Remaining ingredients:
- 1 red onion, peeled and cut into wedges
- 3 potatoes, peeled and cut into wedges
- 6 small, skinless pork sausages (also called chevaps, which are actually Balkan), broken into bite-sized pieces
- 8 mushrooms, halved
- 4 whole cloves of garlic, unpeeled
- 4 vine-ripened tomatoes, cut into quarters
- 1 large handful of beans, trimmed
- 1/3 of a cup of water
- 1 tbs of flour
Method:
Preheat your oven to 220 degrees celsius (200 for fan forced). In a baking dish, combine the marinated chicken, red onion, potatoes, sausage pieces, mushrooms and garlic with a few good glugs of olive oil and some salt and pepper. Toss with your hands so the marinade coats all the ingredients.
Bake for 50 minutes, checking after 35 minutes to see how it’s progressing.
After an hour, add the tomatoes and beans and stir through. Try to ensure the potatoes are mostly at the top, so they don’t go soggy in the juices, letting them to go golden and crispy. Taste the sauce to check for seasoning and add more, if required. Bake for a further 15 minutes – enough to cook the beans and tomatoes, but so the tomatoes hold their shape.
Serve onto plates, but leave most of the juices in the pan. Place the pan on your stove-top and bring to a gentle boil. Mix the flour and water in a small bowl and add to the simmering juices. Whisk until the sauce starts to thicken. Once a good consistency, spoon over the chicken. Garnish with chopped parsley.
I think this dish doesn’t only reflect the flavours that have been brought to Australia over the past 60 years – but it also reflects the kind of food Australians like to eat every day- food packed with flavour, but without fuss and pretension.
I hope this dish is something my Food Hero, Rick Stein would love! I guess we’ll just have to wait and see!
Be Inspired~
Lisa
Chorizo and chickpea stew
This recipe is fabulous, not only because it’s a fast, quick and easy one-pot wonder, but it’s also bursting with flavour.
Chorizo is a priority ingredient in my cooking at the moment – I mean I love it – but Matt loves it more. He’s always wanting a risotto, but with chorizo in it. Then there’s pasta, with chorizo in it – even chorizo on homemade pizza. I think he was Spanish in a previous life!
The great thing about chorizo is that it’s a great way to inject instant flavour into a dish – it’s packed with paprika and other spices, and as you gently fry it in olive oil – you can see the oil turn red and beautiful.
That’s why this recipe works with so few ingredients – because the star of the dish is bursting with sumptuous flavour.
I have taken this one from Nigella’s latest book – Nigella Kitchen. I was very excited when it finally arrived from Amazon and after seeing her whip this up as part of the TV series, and because of Matt’s love for chorizo – I thought I’d make it the first recipe I’d try. Of course, I made a few changes – because I just can’t help myself.
Chorizo and Chickpea stew
-
4tbs of olive oil
-
2 chorizo sausages, sliced into rounds (This is the centrepiece of the dish, so make sure you use a good quality one, I used Istra from the Daylesfod region of Victoria – their smallgoods are amazing!)
-
1 tsp ground cummin
- 1/4 cup of red wine vinegar
-
1 400gm tin of chickpeas, drained and rinsed
-
2 400gm cans of diced tomatoes (preferably organic)
-
1 cup of chicken stock (maybe a little more, if the consistency seems too dry)
-
Sea salt and freshly ground black pepper (to taste)
-
1 handful of chopped, fresh coriander
-
The juice of half a lemon
-
A dollop of natural yogurt, to serve (optional)
Method:
Heat olive oil in a large, heavy-based saucepan. Add the chorizo and cook until the oil start to turn redish. This means the sausage is releasing its flavours.
Add the cumin and stir for one minute. Raise the heat and add the red wine vinegar. Allow to cook for a minute or two, allowing the vinegar to reduce slightly.
Add the chickpeas, tomatoes and stock and bring to the boil. Reduce and leave to simmer for 5 minutes or so. Taste at this point for seasoning, and add salt and pepper to taste. If, at this point the dish is looking a little dry, add a little more chicken stock, or water.
Now, mix through the coriander and lemon juice and serve immediately.
To serve: I cooked some simple cous cous (I will share my best basic cous cous recipe with you tomorrow, so stay tuned for that) – and added a dollop of natural yogurt to each plate. This really adds another dimention to the overall flavours. This will serve 4 people.
This is quite different to Nigella’s recipe – she used sherry rather than red wine vinegar. I just didn’t have any on hand. She also put in some dried apricots when she added the tomatoes. However, I’m not a fan of dried fruit, so I left them out. But, you’re welcome to add them, if you like.
After watching the series and having a good look through the book – I can’t wait to try more of these recipes! I’ll let you know how I go 🙂
Be Inspired~
Lisa
Chicken with rataouille and risoni
This recipe is fantastic because it’s very balanced – it has protein, veg and carbs – and best of all, it’s absolutely delicious and freezes extremely well.
I’m really wanting to inspire busy people to cook at the moment – setting aside a day a fortnight, or even a month, to have a big cook up and fill the freezer with yummy dishes. Not only will it reduce the stress in your life, but it will also ensure you and your family are eating good, healthy food, that won’t break the bank.
I had some really awesome comments on my post on freezing food the other day – click here to read the post and the tips and tricks Uforic Food readers offered on how to do it successfully.
This post set records for readership on this blog, so I figure it’s the sort of thing people are really interested in. I know I am seeing as I am trying to cook meals for my dad and stack his fridge with yummy goodness!
So, this recipe is one of the ones I cooked the other night (I found it on taste.com.au) – because it’s very much ideal for freezing, and because it’s such a complete meal, you don’t have to worry about trying to think of something to go with it which will freeze well.
Chicken with Rataouille and Risoni
- 1 large eggplant, cut into 2.5cm pieces
- 2 large zucchinis, thickly sliced
- 1 red capsicum, halved, thickly sliced
- A good drizzle of olive oil
- 8 large chicken drumsticks
- 2 cups Italian tomato pasta sauce (or you could make my marinara sauce, click here for the recipe)
- 1/3 cup dried risoni pasta
- 1/2 cup basil leaves, chopped
Method
Preheat oven to 240°C. Place eggplant, zucchini and capsicum in a large roasting pan. Drizzle lightly with olive oil and some salt and pepper and use your hands to toss the vegies and ensure all the vegies are lightly coated. Roast for 25 to 30 minutes or until light golden.
Meanwhile, heat a heavy-based saucepan over high heat. Add a little olive oil and cook the drumsticks in batches, turning occasionally, for 5 minutes or until light golden (you could use thigh fillets as well, if you like). Return all chicken to saucepan. Add pasta sauce. Reduce heat to medium-low. Cover and simmer for 10 minutes. Stir in risoni. Cook, covered, for a further 10 minutes or until chicken is cooked through. Do keep an eye on it to make sure the risoni doesn’t stick to the bottom of the pan.
Stir in roast vegetables and basil. Season with salt and pepper.
Serve or transfer to containers for freezing.
This recipe is so easy and simple, but the roasting of the vegetables really adds a lovely depth of flavour. I know some people would like to use breast chicken for this. However, I really urge you not to, I think it would really take away from the flavour.
If you have a recipe that you’d like to share – email me at lisa.foreman_media@yahoo.com.au . I’d love to hear from you 🙂
Be Inspired~
Lisa
Freezing meals – is it the way to go?

Frozen food may not look that appetising in this state - but it's healthier, cheaper and quicker than take-away! Post your feedback below.
I’m still not too sure about the whole idea of cooking food and then freezing it – even though I have been doing it for years now – mostly for my wonderful dad, but earlier back in my uni days.
So, I wanted to call on you all to give me some tips, tricks and recipes that work well for you, which you can post in the “comments” section below.
As a food enthusiast, I always think it’s better to cook and eat everything fresh – but of course, that’s not always possible. People do lead very demanding lives these days with long hours at work, kids (not that I’d know anything about that, but I can imagine it would be hard), commuting, new exercise regimes (I know something about that – really need to get on the treadmill again!!). The list goes on.
One thing that does dismay me is that in order for people to fit everything in – they get take-away rather than cooking. I’m not talking on the odd occasion – I mean once a week is fine – but almost every night!! This just boggles my mind!
Take-away is soooo expensive!! Quite often (depending on your choices) it’s not all that healthy – in fact it can be fat laden and horrible! I also think it’s a bit of a falesy that take-away saves time. I mean unless you get it home-delivered, by the time you ring up, wait a bit, drive down to pick it up – probably wait a bit longer, and then drive home – you could have cooked a delicious, healthy meal at home. Just on this blog alone I can name five recipes I could have whipped up in the time it takes to pick up your take-away (garlic and chilli prawns, marinated lamb, whipped up quickly on the barbecue, Pollo alla Cacciatora, baked fish with tomato and lemon and of course – Matt’s Meatlovers Pasta).
I don’t mean to blow my own trumpet, but I know all these dishes would taste better than KFC or pizza (don’t tell Matt I said that! LOL. It is his favourite food)
The reason for my critique on frozen food is that I am really enjoying doing weekly cook-ups for my dad – so that he’s always got food to eat when he gets home from a hard night working at Anglesea Fruitz. However, I’m afraid he’s getting sick of eating the same old things – as in stuff I know freezes well – like casseroles of all kinds, spaghetti bolognese etc. I even freeze risotto – although I know this doesn’t re-heat that well.
I was also hoping that your tips, tricks and recipe ideas might inspire others to cook and freeze, rather than opt for expensive take-away. I mean just imagine how much money you could save if you dedicated a day a week, or even a fortnight, to make a few nice casseroles, soups etc to stockpile in your freezer for busy nights when you just can’t be bothered.
I can imagine that if I’m lucky enough to have some little kiddlywinks running around one day, that taking care of them is going to take up almost all of my time. But I think we owe it to ourselves and to the health of our families to take some time out and cook food – even if it means we stick it in the freezer for later use. I mean simple pasta sauce like my marinara recipe is so versatile that you can make it, freeze it, and then use it to whip up quick pasta dishes where all you have to do is thaw it out, cook some pasta and then add some mince, bacon, or other flavourings like capers, olives, capsicum etc. In no time at all – you have a meal on the table and little washing up.
Tonight mum is coming over and we are taking over Matt’s mum’s kitchen to whip up some yummy stuff for dad to have for dinners for the next weeks or so – which will be served up into meal-sized containers and labelled accordingly. I am planning on making chicken and lemon drumsticks, bolognese sauce, chilli con carne and a lovely chicken risoni dish. Except for the bolognese sauce – they are all new dishes I found on the web. So, I’ll let you know how they go.
In the meantime, I’d really love to hear your stories around freezing meals. What recipes have worked well for you? Are there some important tips people should follow if they are going to head down this path.
Here are five things I always consider when I’m freezing meals:
- How will the recipe go being reheated? I always avoid freezing meals that contain cream, as I’ve found it doesn’t work well
- Always use good, air-tight containers that are labelled – so you know what’s in them.
- Try not to keep frozen meals in the freezer too long – 3 months, tops.
- I always figure out the meals I would like to make, and then do a comprehensive shopping list – including adding plastic containers to the list. There’s nothing worse then cooking a whole stack of food and then having no containers to put it in.
- After putting the food in the containers, ensure it has cooler to room temprature before putting the lid on and putting it in the freezer.
Leave your tip in the comments sections below.
Cheers,
Lisa
